Note: if you only are interested in the how-to just scroll down.
With this post I want to tell you about finding a way to circumvent security mechanisms in the Amazon FireTV. To achieve this goal work of different parties is combined to overcome different problems. You will get some background information on technologies which will help you to do projects like this yourself.
FireTV security in a nut shell
The Amazon FireTV is a nice set-top box with a state-of-the-art ARM CPU and FireOS, which is basically Android with some modifications.
Amazon ships FireOS without root access and with a locked boot-loader. This is quite common on Android devices. Effectively, it means that you can’t execute commands that require root privileges like write data directly to block devices. The locked boot-loader implies that only signed kernels will be executed by the boot-loader. The boot-loader in turn needs to be signed to be executed by the CPU. This is usually described as secure boot and is ensured by a chain-of-trust. On mobile phones some vendor allow the boot-loader to be unlocked by the customer e.g. Google with the Nexus devices.
The US version of the FireTV has been shipped with a FireOS version which was vulnerable to the exploit used in towelroot. This has been fixed in FireOS version 51.1.2.0_user_512073320 and all devices shipped in the EU seem to have that fixed version installed. Without such an exploit we have no way to grain root privileges from within the stock firmware
To run a custom recovery (which is basically a fall-back environment used e.g. during firmware upgrades) or custom kernel the boot-loader needs to execute unsigned code. At first XDA member rbox used a signature checking bug in the Qualcomm boot-loader. This bug was fixed in FireOS 51.1.1.0_user_511069920, although I’m not 100% sure of the exact version.
Until FireOS Version 51.1.4.0_user_514006420 a downgrade of boot-loader and firmware is possible. Newer versions of FireOS blow an eFUSE in the CPU of the FireTV which prevents the vulnerable boot-loader from booting. Up to now (17.01.15) there is no known way to unlock the new boot-loader or make the old boot-loader boot with the blown eFUSE. Except having a FIB at hand to fix the eFUSE ;).
If you want to use it only as a media center, the FireTV is already quite useful in its unrooted state as it can run Kodi (XBMC) without any modification, so you might never need root. But that’s no reason not to try and figure out a way to root it ;).
The term “rooting” in context of an Android device basically means placing a su binary in the /system/xbin folder and give it the correct file permission. In case of the FireTV we are not able to write there without already being root. We also have (at the time of writing) no Linux userland exploit which would allow us to become root. What’s left is finding a way to write to the FireTV’s /system partition.
A look into the FireTV shows that it uses an eMMC as storage. An eMMC is basically a SD card with some more data lanes which is soldered to the PCB. eMMCs have a significant advantage over normal NAND memory: a built-in controller takes care of tasks like wear leveling and the chip access. This makes it easier for the vendor to integrate it. It also allows us to access the memory through very few wires. In fact in most of the cases you only need four. We’ll dive into the specifics of this later.
What has happened so far
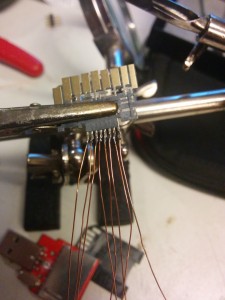
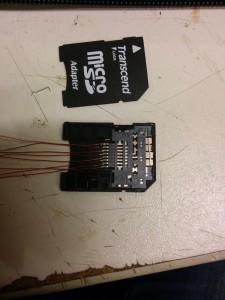
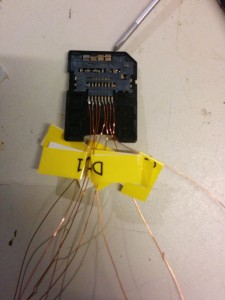
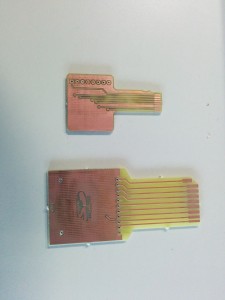
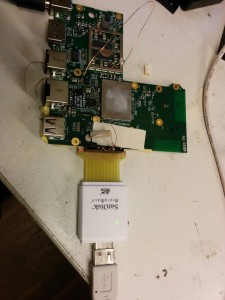
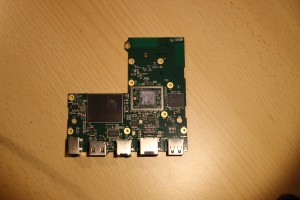
The folks at gtvhackers.com did some research on the FireTV and published very early a picture of the PCB where the eMMC has been removed and the pin-out has been marked. The eMMC is packaged in a BGA package. That means we can’t access the pins directly as they are below the chip. But all pins we need are accessible via pads on the PCB. It was suggested to use a SD card reader to interact with the eMMC. An approach which sounded very promising. So we started to build an adaptor and tried many different combination of readers and wiring but without any luck.
Our first guess was that the wires were just to long and there would be to much cross talk so we build a new adaptor based on a sparkfun design.
Our first attempt was to power only the eMMC through an external power source so the CPU of the FireTV would not need to boot up. A running CPU would result in the clock on CLK line to the eMMC, which would interfere with the clock generated by the SD card reader. Sadly, all attempts to feed the chip externally failed (or at least we thought that at this time).
So the next thing we did was grounding the oscillator of the CPU to stop it from running and power the FireTV through its own power supply as suggested in the xda-developers forum. At this point we saw some more output when we connected the FireTV to our adapter, but there was still no way to interact with the eMMC. So we looked closer into the eMMC data sheet and found that it is communicating on 1.8V. A normal SD card will start at 3.3V and will later (in case of SDHC) drop to 1.8V. So we realized that we will need a level shifter, an approach that was also suggested at xda-developers.
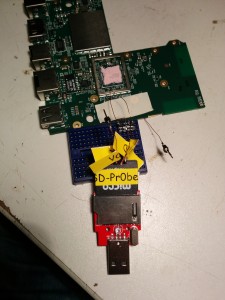
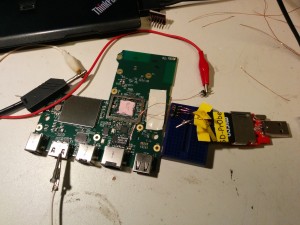
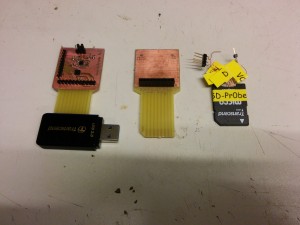
Our little project was then interrupted by the preparations of the 31C3, so we didn’t touch anything for nearly one month. After that maximus, a member of the ghtv team (now called exploitee.rs published a pictures of an adaptor with a level shifter so it was time to open eagle and build our own. Luckily for you, maximus now sells these adaptors so you don’t have to build one yourself. But we neither wanted to wait nor just use one. We wanted to build our own. In the picture below you see all three iterations of the adaptor. The adaptor holds two ICs: the TXS02612 is an SDIO port expander which is usually used to connect smart phone base bands to up to two eMMCs. It is used here as a level shifter. The second IC is MIC5355/6. It is a low dropout voltage regulator which provides the 1.8V and 2.5V from the 3.3V supplied by the SD card reader. This IC should not be necessary if you want to reduce the parts as the FireTV can provide 1.8V by itself. But to have the regulator could become handy on other devices. I will upload the eagle design files after some cleanup is done. Our adaptor differs a little from the one that you can buy as it uses a the regulator from the alpha version. The final one only provides 1.8V which is totally fine for the FireTV. We also connect all four possible data lanes and added a debug header.
With that adaptor we were able to access the eMMC and deploy the su binary. As more and more devices are shipped with eMMCs, this adaptor will be useful for future hacks. Below you find a short how-to for this hack and how you can get your FireTV boot-loader unlocked and add some more nice features.
In the following how-to we will show you how to do the eMMC hack, root the device, unlock the boot-loader and install a custom ROM, a custom recovery and rboxes boot menu.
HOW-TO
Disclaimer: This procedure can turn your FireTV into a nice brick. It also will void your warranty and you do all this on you own risk.
Preparations
Files you will need:
- Custom ROM from: http://www.aftvnews.com/roms/ (51.1.4.0_514006420updated + newest) + latest
- Latest custom recovery from http://www.aftvnews.com/recovery/
- FireTV Boot Menu from XDA-Developers
- rbox aftv-unlock from here
- FireTV Stock FW 51.1.0.1_user_510055620 and Stock recover 51.1.0 http://www.aftvnews.com/software/ ( 51.1.0.2_user_510058520 from the mirror should also work if you can’t reach the amazon server because of blocked updates)
- Towelroot
- Busybox installer (optional)
- The su binary which you will find in the latest SuperSu zip in the arm folder and the Superuser.apk form the common folder
You can upload the files except the apks to the FireTV via ADB, the Android Debug Bridge. The ADB needs to be enabled on the FireTV, available from the developer options menu. Connect to the FireTV with
adb connect <IP of the FireTV>
Copy files with
adb push <filename> /sdcard/
Hint: If you get confused, check the original how-tos, linked from the respective sections, where most of the information are taken from.
Before you start make sure the FireTV is not able to download firmware updates from Amazon. Some hints can be found here. You also can connect the FireTV directly to your PC and give it a static IP address.
1. Gaining root privileges
Note: This only covers the “eMMC root” method. If your device already is rooted or you want to use a different method just skip this.
You need to open the FireTV, have a look at ifixit therefore. After removing the CPU shielding you can access all parts you need.
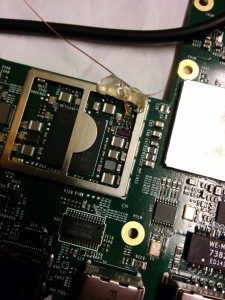
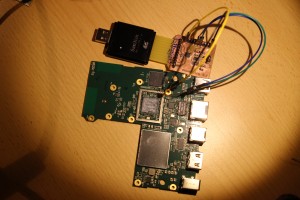
To root the device, you need to connect Data0, CLK, CMD, GND on our adaptor to the FireTV as you can see here and here. Further you need to remove the resistor as marked in the picture.
Note: It seems that CLK pad on the PCB is very easy to rip off. Make sure to use thin wires and don’t put any force on it. As this pad is the only connection we have to the CLK pin of the eMMC loosing this pad will brick your FireTV.
Once you have connected everything, power up the FireTV and connect the SD card reader to your PC.
We assume you use Linux or are able to mount ext4 volumes on your OS. Now look for the system partition which holds the xbin folder.
Copy the su binary from the SuperSu zip to the xbin folder.
sudo cp su /<mount point>/xbin/
Now set the file permission to 4755 which can e.g. be archieved by
sudo chmod 4755 /<mount point>/xbin/su
Unmount all volumes from the eMMC and unsolder the wires. Now either put the 0 ohm resistor, that you removed before, back at its place or just bridge the points with solder.
After the FireTV has booted you can test if everything works by running
adb shell
su
You should see the prompt switching to the root user.
If you like you can now install the Superuser.apk by
adb install Superuser.apk
to have control over the apps that can gain root access.
Note: If you are on a firmware newer than 51.1.4.0_user_514005520 you will currently not be able to unlock the boot-loader so you can skip to step 9.
Now its time to downgrade the FireOS and more important the boot-loader to a vulnerable version.
2. Downgrade stock recovery
We need to do this to be able to downgrade our firmware. This is only necessary if you are on 51.1.4.0_user_514005520. If you are on a older firmware just skip to step 3.
Warning: If your eFUSE is blown (you had a stock firmware >= 51.1.4.1 installed) this will brik your FireTV.
At this time we only achieved root privileges. All software on the FireTV is still in its old state. Lets start changing that.
adb shell
su
dd if=/sdcard/recovery-stock-51.1.0.img of=/dev/block/platform/msm_sdcc.1/by-name/recovery
Do NOT reboot after this or the downgrade will fail and you need to do this again.
3. Downgrade to old stock firmware
This downgrade allows us to run boot images and recovery images that are modified to use the signature checking bug. We need to do this to be able to install a custom recovery and to run the boot-loader unlock. Before you can start rename the .img file you downloaded to update.zip.
chmod 777 /cache/
chmod 777 /cache/recovery
cp /sdcard/update.zip /cache/
cd /cache/recovery
echo --update_package=/cache/update.zip > command
exit
exit
adb reboot recovery
If the recovery folder does not exists on your device just create it with “mkdir /cache/recovery”.
What we have done here is copying an older stock firmware update to the cache partition and place a command file that tells the recovery to “update”.
4. Unlock the boot loader
As we are back on an old stock firmware we lost root access. But don’t worry: good guy geohot is back in business and we can use his towel root as we are now running a firmware version which is exploitable.
Install Towelroot and run it:
adb install tr.apk
run towelroot => make it rain
adb shell
su
cp /sdcard/aftv-unlock /data/local/tmp/
cd /data/local/tmp
chmod 755 aftv-unlock
./aftv-unlock unlock
The boot-loader is unlocked now and we are now able to run unsigned code. This allows us e.g. to run custom firmware by rbox, CWM, rbox boot menu or some Linux distributions.
5. Install custom recovery
Now we install a custom recovery to have a easy way to install firmware, do backups and access the FireTV even with broken FireOS. You may already have a newer version of the recovery, check the file name.
dd if=/sdcard/firetv-cwm_recovery-6.0.5.1.4a.img of=/dev/block/platform/msm_sdcc.1/by-name/recovery
6. Install custom firmware 51.1.4.0 (optional)
This step might not be necessary as you could just jump to installing the boot menu and push the newest custom firmware after that.
This is just a failsafe because newer custom firmware version by rbox will not boot without the boot menu.
adb reboot recovery
install the firmware you copied to the “SD card” earlier via CWM
7. Install the boot menu
The boot menu is a boot image that acts as a third stage loader which allows you to choose between recovery and FireOS. On most of the android phone this is achieved by pressing a button.
The how-tos recommend to install busybox before. I’m not 100% sure why as FireOS brings a md5 implementation but it wont hurt.
(optional)
adb install stericson.busybox.apk
run busybox installer => install
compare md5sum by running
md5sum bootmenu.img
on your PC and the FireTV to be rely sure that the file is ok.
Now you need to mount the /system partition writable and copy the boot image to this partition.
mount -o remount,rw /system
mkdir /system/boot
dd if=/dev/block/platform/msm_sdcc.1/by-name/boot of=/system/boot/boot.img
mount -o remount,ro /system
dd if=/sdcard/bootmenu.img of=/dev/block/platform/msm_sdcc.1/by-name/boot
After that you place the boot menu boot image to the boot partition. The boot menu will execute the boot image we copied to /system/boot.
8. Update to latest custom firmware
After this step you can update to the latest version of the custom firmware via CWM.
You can just follow step 6 but with the latest custom firmware
9. Disable Amazon updates
To prevent the installation of stock firmware which will remove your root access and update your boot loader you now can disable the update service.
adb shell
su
pm disable com.amazon.dcp
Note: This needs to be done again after future firmware updates, factory resets and maybe other events.
10. Further modifications
- Expand Storage to USB (optional)
- If you need more space on your FireTV you can follow this guide.
- Overclock (optional)
- If you need to geed a litte more speed out of the CPU you can have a look at this how-to
- Install exposed and rbox mods (optional)
- This will allow you to extend the FireOS launcher.
- Install Kodi (XBMC) as your launcher (optional)
- Connect a bluetooth keyboard (optional)
11. Trouble shooting
If you have trouble playing prime content after this procedure, you may need to do a factory reset.
12. Further reading
- Hacking the Xbox by Andrew “bunnie” Huang. One of the best books to dive into the topic of hardware reverse engineering dealing with the hack of the original Xbox.
- aftvnews.com If you have not followed the links in how-to jet aftvnews is a good source for news on the FireTV.
- Exploiting Samsung Galaxy S4 Secure Boot by Dan Rosenberg
- unlocking-motorola-bootloader a very good blog post about the unlocking motorola devices which base on a older Qualcomm CPU by Dan Rosenberg
- [REF][R&D] MSM8960 Info, Architecture and Bootloader(s)
Thanks to all the guys at xda-developers for providing information and pointing me to errors in this post.

Brilliant guide and thank you for making it so detailed . Can the SU be added on windows os ? Or does it have to be linux ? If so what are commands ?
Manu thanks
As far as i know there is no stable way to write to an ext4 volume on windows. But you can run a ubuntu VM on your windows maschine.
There are pre installed images ready to download here. Just connect the USB device to the VM.